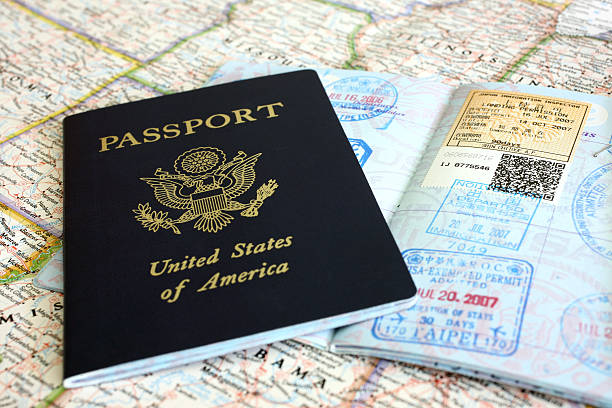
Many people want to study abroad, especially in the US, but they don’t have any idea how to secure a US student visa. If you fall into this category, then you are in the right place. We have provided you with an easy guide that will help you navigate through the US visa process.
In the 2023 fiscal year, the U.S. Department of State issued approximately 446,000 student visas, marking an 8.5% increase from the 411,000 issued in 2022. However, consular officers also denied a record 253,355 student visa applications in 2023, indicating a significant rise in refusal rates. Despite these challenges, U.S. higher education institutions hosted over 1.1 million international students during the 2023/2024 academic year, a 7% increase from the previous year.
In this read, you will learn how to get a US student visa, the basic US student visa requirements, and other relevant guides on how to study in America.
Basic facts About US Students Visa You Should Know
A student visa is a type of visa required by foreign nationals to study and stay in the US for the duration of their studies.
Below are important facts you should know about US students’ visa types.
SEVIS
SEVIS stands for Student and Exchange Visitor Information System. It is a database used by the Department of Homeland Security (DHS) to collect, track, and monitor international students and scholars who enter the United States on a specific student visa. Before applying for your student visa, you will need to pay the SEVIS fee.
I-20 form
This is a Certificate of Eligibility document issued by the U.S. government. It is an approved educational institution certifying that a student has been admitted to a full-time program. and has proof of sufficient financial resources to stay in the United States for his or her duration of studies.
DS-160 Form
Form DS-160 is used to apply for temporary U.S. visas. This form, also known as the Online Nonimmigrant Visa Application, is required of everyone who wants to travel to the US in the short term.
Type of Student Visa
There are three different types of student visas, and the student visa application process varies for each type. The course of study and the type of institution determine the category of visa that will be issued to the student. There are three major types of student visas for which international students can apply in the US
F-1 Student Visa
This type of visa is issued to students who wish to study or conduct research at an accredited US college, university, high school, private elementary school, approved English language school, or other approved academic institutions.
To qualify for this type of visa, a student must enroll in an accredited school in the US, the institution must give the I-20 form to the student, and the student must have proof of sufficient financial support during their stay in the US.
Note: With this type of visa, you cannot work in the USA except for a part-time job on campus, which cannot exceed 20 hours per week.
J-1 Student Visa
J-1 Visa is a nonimmigrant visa for individuals who will be participating in a work-and study-based exchange visitor program that promotes cultural exchange in the US, especially for medical or business training.
To qualify for a J-1 visa, the participant must be proficient in the English language and have appropriate medical insurance.
All applicants must meet the eligibility criteria and be sponsored by the government or a private-sector program. They must have proof of funds to cover their expenses in the US and be able to show plans to remain in the US for a specific period, including their return to their home country.
The participant will receive a DS-2019 form from his or her sponsoring organization or US government agency, which is necessary to apply for a J-1 visa.
M-1 Visa
An M-1 visa is a non-immigrant student visa for individuals who want to pursue a full course of study at a non-academic institution or vocational school in the US. To qualify for an M-1 visa, applicants must be accepted by a vocational institution approved by the United States Citizenship and Immigration Services (USCIS).
Applicants must be sufficiently fluent in English, have sufficient funds, have permanent residence in their home country, and intend to leave the US upon completion of the course of study.
M-1 students may stay in the US for a fixed time period but may not stay more than one year unless they are granted an extension for medical reasons. M-1 visa holders may stay for the length of their training program and optional practical training, plus a 30-day grace period at the end of their training.
Applicants must present a signed I-20 form at a US embassy or consulate in their home country, issued by a designated school official.
International Students also search for the best tips on how to study in Switzerland
How to secure a US student visa
- Apply for a school in the US
- Receive Form I-20 or DS-2019
- Next pay SEVIS Fee (I-901)
- Fill Form DS-160
- Schedule a visa interview.
- Pay the Visa Application Fee
- Attend a visa interview.
- Visa Approval or Decline
#1. Apply for a school in the USA
Before you apply for a student visa, you will need to apply for admission into the undergraduate or graduate program. The school must be on the list of schools approved by SEVIS. Applications to different courses and universities in the U.S.A. can be made three times a year, which include the fall semester, spring semester, and summer.
Applications for admission can be submitted online between December and January, and expect admission notification from the school around March or April.
Once you receive notification of admission, you can proceed with the visa application process. Please note that a student visa may be issued no more than 120 days prior to the start date mentioned on your I-20.
#2. Receive Form I-20 or DS-2019
Now that you have been admitted, you will receive a document called Form I-20 or Form DS-2019 from the institution’s international student office. Students can use Form I-20 to apply for an F-1 or M-1 visa, and Form DS-2019 can be used to apply for a J-1 visa.
Form I-20 has the student’s SEVIS identification number (which starts with the letter N and is followed by nine digits, on the upper right-hand side directly above the barcode), the school’s address, and other important information concerning your program.
This form I-20 will require you to pay certain fees as you proceed with your student visa application.
#3. Next pay SEVIS Fee (I-901)
You can proceed to pay the SEVIS fee online using their portal. For the payment procedure, follow the guidelines below
- Type https://www.fmjfee.com/i901fee/index.html on the address bar
- At the center of the navigation menu, click on pay I-901 fee, and it will open another page
- On this new page, enter your SEVIS ID, Last name, Given name ( first name and middle name), and date of birth
- Click submit
- In case of any mistake, you can send an email to fmjfee.sevis@ice.dhs.gov and explain what information may need to be changed.
- After the payment, print out your confirmation page because you will need to show it during your visa interview.
#4. Fill Form DS-160
The next step is to complete or fill out Form DS-160 on the U.S. Department of State portal (Consular Electronic Application Center). It takes approximately 90 minutes to fill out this form on their portal.
You should have the following documents available while you complete your DS-160:
- You need Passport details
- Digital photograph
- International travel history for the past five years (if you have traveled to the United States before)
- Travel itinerary in case you have made travel arrangement
- SEVIS ID and address of university or institution as printed appear on Form I-20 or Form DS-2019 (This information is your I-20 or DS-2019 form)
- Family information
To fill out Form DS-160, follow the following steps:
- Enter https://ceac.state.gov on the address bar
- Click on Ds-160, an online nonimmigrant Visa Application
- Fill the form
- Click submit
Print the confirmation page you receive after signing the application; it includes a 10-digit barcode and your application ID number, which you will need to make your visa interview appointment.
#5. Schedule a visa interview
The next stage is to book or schedule a visa interview by contacting the nearest US embassy or consulate. The visa application process will remain incomplete until you appear for an interview with a consular officer.
Visa Application Center (VAC) Appointment
The next thing after an appointment with the embassy is the Visa Application Center (VAC) appointment to carry out biometrics. This appointment with the visa application center for biometrics should be at least a day or two before the interview at the consulate
#7. Pay Visa Application Fee
Now that you have scheduled your visa interview, we proceed to make payment. This fee is the same regardless of your country of origin or where you apply. Note that when you pay this fee, it will vary depending on your embassy.
Although many embassies require applicants to pay the application fee before their interviews, not all do. Your embassy should instruct you as to when and how you’ll need to pay your visa application fee. If your embassy requires you to pay this fee before your interview, be sure to bring your receipt as proof of payment to your interview.
#8. Attend the visa interview
You will need the following documents for the visa interview:
- Valid Passport
- SEVIS Form I-20 or DS-2019
- SEVIS fees receipt
- DS-160 application confirmation page
- MRV fee payment confirmation receipt
- Visa interview appointment letter
- At least two Photographs
Also, prepare the following documents:
- Financial capacity proof
- Transcripts from previous school attended
- Standardized test scores (if required by your US school)
#9. Visa Approval or Decline
After the interview, they can either approve or decline your visa, depending on your performance and how well you comply with the visa application process. Once you’ve completed all of the steps above and have received approval for an international student visa to the US, your embassy will return your passport to you with your new visa in it.
Conclusion
We hope our guide will be helpful to you in getting your US student visa and applying for your study program. Our article on the Top 25 Most Affordable States to Study Abroad will also benefit you.
Related Articles
- Indian Visa Application: Best Tips On How To Get A Visa For India
- Study in UK: A Complete Step-By-Step Guide
- A Complete Step-by-Step Guide Including Best Universities, Scholarships, and Student Visa
- Study In France For International Students: A Complete Step-by-Step Guide(Scholarships, and Student Visa)
hello, Ive seen this process before but is there one type of visa where you wouldn’t have to show 20k or more as proof of funding? 🙂
How much will cost me ( in Naira) to process all the requirement for the student Visa please?
Hello ThankGod, the application fee for the most common nonimmigrant visa cost $160 that’s about N70k Currently
Thank you for the explicit explanation. It has been helpful to me.
My question is do you do student visa processing fo intending students to the US?
Hi Chris, thanks for your feedback. We are glad you got value from our article. We will update you on how you can process your student visa pretty soon.
Thanks for your helping